Prior to skin sterile prepping and draping, we discussed with the patient and parents about hair removal to ensure proper surgical exposure and good hair cosmesis. With our new incision, we tend to limit the shaving to around the skin incision site. Some cases have also been performed without shaving the hair.
Explore This Issue
October 2023After sterile draping, the skin incision was made, down to the muscular layer and the skin flap is elevated. A separate level linear incision was then made in the muscle down to bone at the level of the second methylene blue marking made at the template’s neck (1.5cm above the previous marking). The muscle incision was then made using monopolar electrocautery until it reached the bone, and the subperiosteal pocket was raised. If the skin thickness is greater than 9 mm, the magnet and coil part of the device can be positioned lateral to the periosteum, which reduces subperiosteal pocket dissection and allows for easier skin flap thinning. Because the OSIA 2 device is screwed to the titanium implant in the skull, the implant does not need to be placed in a tight pocket like a cochlear implant.
Implant Placement
After appropriate dissection, the implant site was marked on the bone using the sterile template. Drilling was performed according to the manufacturer’s instructions, beginning with a 3-mm then a 4-mm conical guiding drill, then a widening drill with countersink, and finishing with the placement of the BI300 osseo-integrated implant (Cochlear Osia OSI200 Implant: Physician’s Guide). It is important to drill perpendicularly to the bone to avoid uneven actuator seating. The drill was set at 2,000 rpm for the drill guide followed by widening, and 40–50 Ncm for implant placement (Cochlear Osia OSI200 Implant: Physician’s Guide).
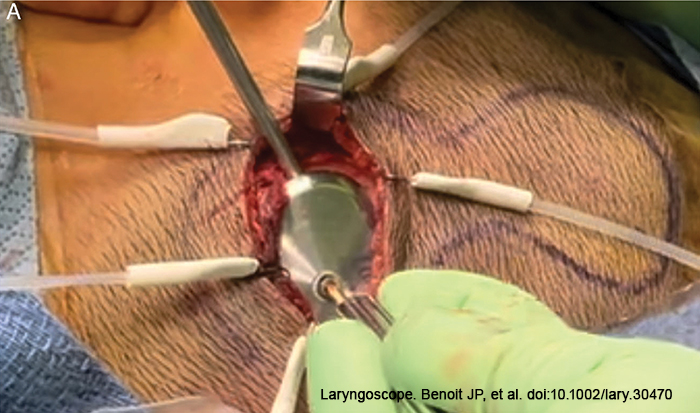
Following implant placement, the bone bed indicator was used to check the surrounding bone to decide whether further drilling was required. The OSI200 was then placed with the coil end in the subperiosteal pocket or lateral to the periosteum, and the actuator portion was screwed to the BI300 implant and hand tightened to a torque of 25 Ncm. Because the actuator is not transparent, it is frequently difficult to align the screw into the BI300 implant due to the nature of the modified small transverse incision. We modified this step using a 30- or 70-degree telescope to endoscopically align the fixation screw into the osseo-intergrated implant. (Figure 1).
Closure
The biplane dissection at two different levels was intended to reduce the risk of device exposure. The muscular/periosteal layer was closed first, followed by the deep subcutaneous layer, and finally skin closure. Mastoid dressing was applied at the end of the procedure.
RESULTS
A total of seven children with aural atresia received MOSIA. One patient had intraoperative sigmoid bleeding, which was controlled with bone wax and changing the implant site. Our youngest patient was 6 years old, and the dura was encountered following the 3-mm conical guiding drilling with no signs of cerebrospinal fluid leak, and a 3-mm implant was inserted. One patient had a partial dehiscence at the skin incision level one week after the surgery, which healed spontaneously with no device exposure, thanks to the biplane approach, as the deeper muscular layer covering the implant was intact.
One month after surgery, all wounds healed nicely with no dehiscence or device exposure. There were no reports of permanent numbness. The children and their families were satisfied. All patients, including the 6-year-old child, had their devices activated one month after surgery with no complications.
